The Basics of the Word Window
Let's briefly review the basic parts of the Word 2003 window before we move onto word processing.
Shown below is the Microsoft Word default window. When Word is launched, a new blank document, or default window, opens in Print Layout view. Although window elements are fully explained in our Windows course, here is a brief explanation of the Word window.

Title Bar
Displays the document name followed by a program name.
Menu Bar
Contains a list of options to manage and customize documents
Standard Toolbar
Contains shortcut buttons for the most popular commands.
Formatting Toolbar
Contains buttons used for formatting.
Ruler
Used to set margins, indents, and tabs.
Insertion Point
The location where the next character appears.
End-of-Document Marker
Indicates the end of the document.
Help
Provides quick access to Help topics.
Scroll bars
Used to view parts of the document.
Status Bar
Displays position of the insertion point and working mode buttons.
Task Pane
Provides easy access to commonly used menus, buttons and tools.
View Buttons
Changes the layout view of the document to Normal View, Web Layout View, Reading Layout View, Print Layout View, or Outline View.
Office Assistant
Links to the Microsoft Office Help feature
Saving a New File
When Saving a File for the First Time:
• Click File on the Menu Bar.
• Select Save - Ctrl+S.

Using the Standard Toolbar to Save:
Choose the Save button on the Standard Toolbar
Using Repeat - Ctrl + Y
The Repeat feature allows you to repeat the last action and can help to save a lot of time as you create your document.
To Use Repeat:
• Click Edit on the menu bar.
• Select Repeat - this command will change names depending on the action you just took. If you need to format a title on one page and wish to format another title the same way using Repeat, it will say Repeat Style.
• Press Ctrl + Y on your keyboard for a shortcut to Repeat.

Viewing the Clipboard items:
• Click Edit on the Menu Bar.
• Select Office Clipboard.
• The Clipboard will appear on the right side of the Word window in the Task Pane.
• The Clipboard will display any of the 24 items you have copied.
Menu Commands:• Edit - cut
• Edit - copy
• Edit - paste
Keyboard Shortcuts:
• Ctrl+C = copy
• Ctrl+X = cut
• Ctrl+V = paste
Become comfortable using the keyboard shortcuts to increase your speed in word processing.
If you cut, copy, or paste something you didn't mean to, use the Undo button or choose not to save changes to your document when you close your document
Let's briefly review the basic parts of the Word 2003 window before we move onto word processing.
Shown below is the Microsoft Word default window. When Word is launched, a new blank document, or default window, opens in Print Layout view. Although window elements are fully explained in our Windows course, here is a brief explanation of the Word window.
Title Bar
Displays the document name followed by a program name.
Menu Bar
Contains a list of options to manage and customize documents
Standard Toolbar
Contains shortcut buttons for the most popular commands.
Formatting Toolbar
Contains buttons used for formatting.
Ruler
Used to set margins, indents, and tabs.
Insertion Point
The location where the next character appears.
End-of-Document Marker
Indicates the end of the document.
Help
Provides quick access to Help topics.
Scroll bars
Used to view parts of the document.
Status Bar
Displays position of the insertion point and working mode buttons.
Task Pane
Provides easy access to commonly used menus, buttons and tools.
View Buttons
Changes the layout view of the document to Normal View, Web Layout View, Reading Layout View, Print Layout View, or Outline View.
Office Assistant
Links to the Microsoft Office Help feature
Change in View
In an effort to provide various ways in which to view your work in progress and remain organized, Word 2003 offers six different views for your document. The six views are Normal View, Web Layout View, Reading Layout View, Print Layout View, Outline View, and Full Screen View.
Normal view is best used for typing, editing, formatting and proofreading. It provides a maximum amount of space without rulers or page numbers cluttering your view.
Web Layout view shows you what your text will look like on a web page.
Reading Layout view is best for documents that you do not need to edit. The goal of this view is to increase legibility so that the user can read the document easily.
Print Layout view shows you what your document will look like when it is printed. Under Print Layout view you can see all elements of the page. Print Preview shows you this as well.
Outline view is used to create and edit outlines. Outline view only shows the headings in a document. This view is particularly handy when making notes.
Full Screen view displays ONLY the document that you are working on. All the other pieces of the Word window are removed except for one button that allows you to Close View Screen.
Changing your Document View:
• Click View on the menu bar.
• Select the view of your choice.

OR
• Click one of the five buttons at the bottom left of your Word window (View Full Screen is not available in this location).

• Click View on the menu bar.
• Select the view of your choice.
OR
• Click one of the five buttons at the bottom left of your Word window (View Full Screen is not available in this location).
Pull-Down Menus
Each Office 2003 program features a menu bar The menu bar is made up of many different menus. Each menu contains commands that enable you to work within the program.
If you have used a previous version of Microsoft Word, you may notice the menu bar in Word 2003 operates a little differently than before.
Word 2003 uses pull-down menus that initially display commands that users most often need.
Operating the new Pull-Down Menus
To Open a Menu:
• Click on a menu name on the menu bar
• View the commands listed under the pull-down menu.
• With the menu open, drag the mouse pointer to a command and click on it to select the command. (As you drag your mouse pointer over the commands, each command is highlighted in blue.)

• If there is a small black triangle next to a command, hover the mouse pointer over the command with the triangle and a cascading menu with additional options will appear. Point and click to make a selection from the cascading menu.

• Commands that are not used often in 2003 are initially hidden from the viewer. If you do not see all the commands on a menu, click on the double arrows at the bottom of the pull-down menu. You can also double-click the menu to expand it

To Open a Menu:
• Click on a menu name on the menu bar
• View the commands listed under the pull-down menu.
• With the menu open, drag the mouse pointer to a command and click on it to select the command. (As you drag your mouse pointer over the commands, each command is highlighted in blue.)
• If there is a small black triangle next to a command, hover the mouse pointer over the command with the triangle and a cascading menu with additional options will appear. Point and click to make a selection from the cascading menu.
• Commands that are not used often in 2003 are initially hidden from the viewer. If you do not see all the commands on a menu, click on the double arrows at the bottom of the pull-down menu. You can also double-click the menu to expand it
Using the Task Pane
When opened, the task pane will appear on the right side of the Word window. The task pane provides easy access to commonly used menus, buttons and tools. By default, the Task Pane will appear when Word 2003 is first launched.
If you do not see your task pane, you can view it by either selecting certain commands or by manually opening it.
To Open the Task Pane:
• Click on View in the menu bar
• Select Task Pane

Along the top bar of the task pane you should see small backwards and forwards buttons on the left as well as a down arrow on the right. To view different task panes available to you, click on the down arrow. Once you have opened different task panes, you can navigate through them by clicking on the left and right arrow button on the left. To close your task pane, click the x symbol on the far right of the bar.
When opened, the task pane will appear on the right side of the Word window. The task pane provides easy access to commonly used menus, buttons and tools. By default, the Task Pane will appear when Word 2003 is first launched.
If you do not see your task pane, you can view it by either selecting certain commands or by manually opening it.
To Open the Task Pane:
• Click on View in the menu bar
• Select Task Pane
Along the top bar of the task pane you should see small backwards and forwards buttons on the left as well as a down arrow on the right. To view different task panes available to you, click on the down arrow. Once you have opened different task panes, you can navigate through them by clicking on the left and right arrow button on the left. To close your task pane, click the x symbol on the far right of the bar.


Saving a New File
When Saving a File for the First Time:
• Click File on the Menu Bar.
• Select Save - Ctrl+S.
Using the Standard Toolbar to Save:
Choose the Save button on the Standard Toolbar
Save As Dialog Box
After selecting Save from the Menu Bar or the Standard Toolbar, the Save As Dialog Box appears.

To Specify a File Location:
• Open the Save In: drop down list box.
• Choose 31/2 floppy (A:) if saving to a floppy disk.
• Choose (C:) if saving to your hard disk.
• Name your file in the File name: box.
• Click Save.
If you do not choose a file name, Microsoft Word will assign a file name for you. It assigns the first line of text in you document, unless you give it a different name when prompted in the File name box.
If you do not specify a file location, Office uses the My Documents folder as the default location. So, if you can't find a file, check My Documents.
After Naming and Saving a File Once:
• Click the Save button on the Standard toolbar
OR
• Go to the File menu and choose Save. You will not get a Save As dialog box again.
After selecting Save from the Menu Bar or the Standard Toolbar, the Save As Dialog Box appears.
To Specify a File Location:
• Open the Save In: drop down list box.
• Choose 31/2 floppy (A:) if saving to a floppy disk.
• Choose (C:) if saving to your hard disk.
• Name your file in the File name: box.
• Click Save.
If you do not choose a file name, Microsoft Word will assign a file name for you. It assigns the first line of text in you document, unless you give it a different name when prompted in the File name box.
If you do not specify a file location, Office uses the My Documents folder as the default location. So, if you can't find a file, check My Documents.
After Naming and Saving a File Once:
• Click the Save button on the Standard toolbar
OR
• Go to the File menu and choose Save. You will not get a Save As dialog box again.
Saving a File Under a New Name
If you wish to create an exact copy of an original document for editing or revising purposes, you should perform a Save As on the file and save it under a new name. This will guarantee that you always have a saved, original copy.
Follow these steps to perform a Save As:
• Click File from the menu bar.
• Select Save As. The Save As Dialog Box appears.
• Type a new name for your file in the File name: box
• Click Save.
- Choose Save As to rename a document. Be careful not to overwrite your original file.
Did you Know?
Save periodically when you are working in an application. Losing information is never fun! You can quickly save by using the quick-key combination Ctrl + S
If Word encounters a problem, it may automatically shut down without giving you the chance to Save. The Document Recovery Task Pane will appear the next time you open Word. This pane allows you to view files that were recovered when Word discontinued working properly. Select the best version of your document and make sure to save it.
Backspace and Delete
Use the backspace and delete keys (on your keyboard) to erase text in your document.
• The backspace key erases the text to the left of the insertion point one character at a time.
• The delete key (located under the Insert key) erases the text to the right of the insertion point.
Use the backspace and delete keys (on your keyboard) to erase text in your document.
• The backspace key erases the text to the left of the insertion point one character at a time.
• The delete key (located under the Insert key) erases the text to the right of the insertion point.
Using Undo - Ctrl + Z
Have you made a mistake in your document and needed to go back and make changes, but you thought it was too late? Good news! Word offers a feature that helps prevent this from happening.
The Undo command lets you "undo" or delete the last change made to your document. As you can imagine, this is a very useful feature. If you make a change or mistake that you do not want or did not mean to do, you can simply "undo" your action.
Word remembers up to 300 actions in a document and allows you to undo any or all of them as long as you haven't closed the document first.
To Use Undo:
• Click Edit on the menu bar.
• Select Undo - this command will change names depending on the action you just took. If you accidentally deleted a sentence, it says Undo Clear.
• Press Ctrl + Z on your keyboard for a shortcut to Undo.
OR
• Undo all your recent actions by repeatedly clicking the Undo button located on the Standard toolbar

Notice the small list arrow next to the Undo button When you click on it, you see a list of all the separate actions you have performed on the document you are working on. You can select as many actions as you want to undo.
IMPORTANT: If you undo an action in the middle of the list, you will also undo all the actions above the one you select. For example, if you undo the 15th action in your list, you will also be undoing the 14 actions that came before the one you select.

Have you made a mistake in your document and needed to go back and make changes, but you thought it was too late? Good news! Word offers a feature that helps prevent this from happening.
The Undo command lets you "undo" or delete the last change made to your document. As you can imagine, this is a very useful feature. If you make a change or mistake that you do not want or did not mean to do, you can simply "undo" your action.
Word remembers up to 300 actions in a document and allows you to undo any or all of them as long as you haven't closed the document first.
To Use Undo:
• Click Edit on the menu bar.
• Select Undo - this command will change names depending on the action you just took. If you accidentally deleted a sentence, it says Undo Clear.
• Press Ctrl + Z on your keyboard for a shortcut to Undo.
OR
• Undo all your recent actions by repeatedly clicking the Undo button located on the Standard toolbar
Notice the small list arrow next to the Undo button When you click on it, you see a list of all the separate actions you have performed on the document you are working on. You can select as many actions as you want to undo.
IMPORTANT: If you undo an action in the middle of the list, you will also undo all the actions above the one you select. For example, if you undo the 15th action in your list, you will also be undoing the 14 actions that came before the one you select.
Using Repeat - Ctrl + Y
The Repeat feature allows you to repeat the last action and can help to save a lot of time as you create your document.
To Use Repeat:
• Click Edit on the menu bar.
• Select Repeat - this command will change names depending on the action you just took. If you need to format a title on one page and wish to format another title the same way using Repeat, it will say Repeat Style.
• Press Ctrl + Y on your keyboard for a shortcut to Repeat.
Cut, Copy, Paste
Often in word processing, you will need to transfer information from one document to another. Instead of having to re-type or replace this information, Word allows you to move a block of text (a word, sentence, paragraph, page, document, or graphic). Cut, Copy and Paste are extremely time-saving features. The Cut, Copy and Paste buttons are located on the Standard toolbar

Cut and Paste:
• The Cut feature allows you to remove selected text from the document and temporarily place it on the Office Clipboard.
• The Clipboard is a temporary storage file in your computer's memory. Items placed on the Clipboard will remain there until you exit Word.
• The Paste feature allows you to get text from the Clipboard and place it in the same or even another document.
Copy and Paste:
• The Copy feature allows you to copy selected text from the document and temporarily place it on the Clipboard.
• The Clipboard is a temporary storage file in your computer's memory.
• The Clipboard can hold up to twenty-four items. Once you copy the 25th item, the first copied item is deleted.
• The Paste feature allows you to select any of the collected items on the Clipboard place it in the same or even another document.
You can Copy information from many different sources including Websites, Emails, and other Office
applications like Excel and PowerPoint.
Often in word processing, you will need to transfer information from one document to another. Instead of having to re-type or replace this information, Word allows you to move a block of text (a word, sentence, paragraph, page, document, or graphic). Cut, Copy and Paste are extremely time-saving features. The Cut, Copy and Paste buttons are located on the Standard toolbar
Cut and Paste:
• The Cut feature allows you to remove selected text from the document and temporarily place it on the Office Clipboard.
• The Clipboard is a temporary storage file in your computer's memory. Items placed on the Clipboard will remain there until you exit Word.
• The Paste feature allows you to get text from the Clipboard and place it in the same or even another document.
Copy and Paste:
• The Copy feature allows you to copy selected text from the document and temporarily place it on the Clipboard.
• The Clipboard is a temporary storage file in your computer's memory.
• The Clipboard can hold up to twenty-four items. Once you copy the 25th item, the first copied item is deleted.
• The Paste feature allows you to select any of the collected items on the Clipboard place it in the same or even another document.
You can Copy information from many different sources including Websites, Emails, and other Office
applications like Excel and PowerPoint.
Working with Blocks of Text
To Cut and Paste a Block of Text:
• Select the text you want to move.
• Click the Cut button on the Standard Toolbar
• Place the insertion point where you want the text inserted
• Click the Paste button
To Copy and Paste a Block of Text:
• Select the text you want to move.
• Click the Copy button on the Standard Toolbar
• Place the insertion point where you want the text inserted.
• Click the Paste button
• Once the item has been pasted, you can determine the formatting by clicking on the Paste Options button that appears just below your pasted selection. Check or de-select any of the following options: o Keep Source Formatting - maintains the text formatting of the original document.
o Match Destination Formatting - formats the pasted text to match the text formatting in the document in which it was pasted.
o Keep Text Only - removes any graphics that you may have copied along with the copied text.
o Apply Style or Formatting - allows you to choose a specific format from the Styles and Formatting menu.
Viewing the Clipboard items:
• Click Edit on the Menu Bar.
• Select Office Clipboard.
• The Clipboard will appear on the right side of the Word window in the Task Pane.
• The Clipboard will display any of the 24 items you have copied.
Menu Commands:• Edit - cut
• Edit - copy
• Edit - paste
Keyboard Shortcuts:
• Ctrl+C = copy
• Ctrl+X = cut
• Ctrl+V = paste
Become comfortable using the keyboard shortcuts to increase your speed in word processing.
If you cut, copy, or paste something you didn't mean to, use the Undo button or choose not to save changes to your document when you close your document
Drag and Drop
The drag and drop method of moving text allows you to move selected text using your mouse.
This method is convenient for moving text when:• Moving text from one location to another within a document.
• Moving text to another document.
To Drag and Drop Selected Text:
Drag:
• Select the text you wish to move.
• Place the mouse pointer anywhere on the selected text without clicking.
• Click and hold the right mouse button until the insertion point changes into a white arrow pointing up to the left.
• Right click and drag the selected text to the new location.
Drop:
• During this process, the mouse pointer changes to a box with a small white arrow over it, indicating you are dragging text.
• When you reach the new location, release the mouse button to drop the text into place.
• Once you release the mouse button a menu list will appear that offers you the following options:
o Move Here
o Copy Here
o Link Here
o Create Hyperlink Here
o Cancel
(Be sure to remove the selection highlight before pressing any key, so that you do not delete your newly moved text. If you do accidentally delete, simply press the Undo button).
AutoCorrect
Word's AutoCorrect feature can assist you in word processing tasks. AutoCorrect can help you locate misspelled words and correct them as you type. AutoCorrect can also be customized so that commonly used words will be automatically entered without having to type the entire word.
Examples:
When typing the misspelled word, stannd, Word will automatically convert this typo to the correct spelling, stand.
Instead of having to write a long proper noun like, GCFLearnFree.org, you can customize AutoCorrect to automatically complete the rest of the proper noun once you type the letters GCF.
Modifying AutoCorrect:
• Click Tools
• Select AutoCorrect Options from the menu bar. The AutoCorrect Options dialog box appears.
• Check or de-select any of the following options
• Use the With: box to type the correct word.
• Click Add

If you type a misspelled word into AutoCorrect's With: box, AutoCorrect always misspells that word.
If AutoCorrect changes a word that you don't want it to change, you can hover the pointer over the area where the autocorrection was made and a Smart Tag will appear that allows you to reset the original word. Click on the Smart Tag and a drop-down list with options to reverse the action is displayed.

• Click Tools
• Select AutoCorrect Options from the menu bar. The AutoCorrect Options dialog box appears.
• Check or de-select any of the following options
- Show AutoCorrect Options buttons.
- Correct two initial capitals.
- Capitalize the first letter of the sentence.
- Capitalize the first letter of table cells.
- Capitalize names of days.
- Correct accidental usage of Caps Lock key.
- Replace text as you type.
• Use the With: box to type the correct word.
• Click Add
If you type a misspelled word into AutoCorrect's With: box, AutoCorrect always misspells that word.
If AutoCorrect changes a word that you don't want it to change, you can hover the pointer over the area where the autocorrection was made and a Smart Tag will appear that allows you to reset the original word. Click on the Smart Tag and a drop-down list with options to reverse the action is displayed.
Find and Replace
Word 2003 allows you to search for specific words in your document as well as fonts, special characters and formats. The Find and Replace functionality can really help save you time and effort in your word processing goals.
For example, consider a document you are editing that displays Word XP needs to be updated to Word 2003 Currently the document has the text, Word XP, typed again and again throughout the document. Using Find and Replace to replace Word XP with Word 2003 will save you much time and effort in your editing process.
Using Find-CTRL+ F
• Click Edit on the menu bar
• Select Find The Find and Replace dialog box appears.
• Type a word, phrase or format in the Find What box.
• Click Find Next to start the search.
• Word will jump to the first instance of this word and will highlight the word for easy location.
• Continue Clicking the Find Next button to find all other instances of this word.
OR
Check the Highlight all items found in: box to find all instances of the word at the same time. Use the list box below to select all, or portions of your document.

• Type a word, phrase or format in the Find What box.
• Click More to conduct a detailed search.
• Click the Search list box if you want to limit your search to a specific part of the document.
• Use the check boxes to limit your search.
• Click Format if you want to limit your search to words in a specific Font, Paragraph, Tab, Language, Frame, Style or Highlight.
• Click Special to search for punctuation marks or section breaks.
• Click Find Next to start the search.
• Click Edit on the menu bar
• Select Find The Find and Replace dialog box appears.
• Type a word, phrase or format in the Find What box.
• Click Find Next to start the search.
• Word will jump to the first instance of this word and will highlight the word for easy location.
• Continue Clicking the Find Next button to find all other instances of this word.
OR
Check the Highlight all items found in: box to find all instances of the word at the same time. Use the list box below to select all, or portions of your document.
You can perform a more detailed search by clicking the More button on the Find and Replace dialog box:
• Click Edit on the menu bar
• Select Find The Find and Replace dialog box appears.• Type a word, phrase or format in the Find What box.
• Click More to conduct a detailed search.
• Click the Search list box if you want to limit your search to a specific part of the document.
• Use the check boxes to limit your search.
• Click Format if you want to limit your search to words in a specific Font, Paragraph, Tab, Language, Frame, Style or Highlight.
• Click Special to search for punctuation marks or section breaks.
• Click Find Next to start the search.
Using Replace - CTRL + H
• Click Edit on the menu bar.
• Select Replace The Find and Replace dialog box appears.
• Type the word, phrase or format in the Find What: box that you are searching for.
• Type the word, phrase or format in the Replace With: box that will replace what is in the Find What: box
• Click Find Next to conduct your search.
• When Word finds a word of phrase, do one of the following:
o Ignore it.
o Click Replace.
o Click Replace All to replace every occurrence of the selected text with the replacement text.
• Click Find Next to bypass it and find the next.
• Click Cancel to quit.
Did You Know?
Thesaurus: a book of words that have the same or nearly the same meaning
Are you having trouble finding the right word to use? Word offers a Thesaurus feature that can help you find just the right word.
Using the Thesaurus:
• Click Tools on the Menu Bar.
• Select Language and then follow the cascading menu to Thesaurus.
OR
• Use the quick key combination, Shift + F7
Spell and Grammar Check
Not only does Word allow you to Undo possible mistakes in your document and Paste corrections, it also automatically reviews your grammar and spelling as you type. Green wavy lines are placed underneath possible grammar mistakes and a red wavy line under possible spelling mistakes. All of Word's grammar and spelling errors may not be correct, so you can choose to ignore these error markings and keep typing, or you can correct the mistakes and/or add the corrections to Word's dictionary.
Not only does Word allow you to Undo possible mistakes in your document and Paste corrections, it also automatically reviews your grammar and spelling as you type. Green wavy lines are placed underneath possible grammar mistakes and a red wavy line under possible spelling mistakes. All of Word's grammar and spelling errors may not be correct, so you can choose to ignore these error markings and keep typing, or you can correct the mistakes and/or add the corrections to Word's dictionary.
Check Spelling as you Type
Word puts a red wavy line under possible spelling mistakes. If you click on the suspected misspelling, Word gives you one or more suggested corrections.
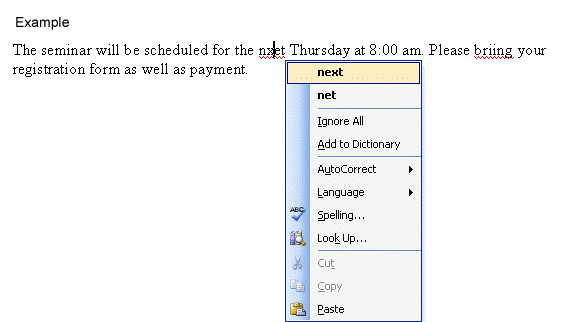
To Use Spell Check as You Type:
• Place your l-Beam over the misspelled word and right-click.
• A menu list displays the following options: boldfaced suggested spellings, Ignore All, Add to Dictionary, AutoCorrect, Language, Spelling and Look Up.
o Select the boldfaced suggestion to replace the incorrectly spelled word in the document.
o Select Ignore, and Word ignores all future instances of this spelling in this document.
o Select Add to Dictionary, and Word adds the underlined word to the dictionary so it won't be flagged as an error in any other document you create.
o Select AutoCorrect to add the correct spelling to your list of words that Word automatically corrects as you type.
o Select Language to specify a word as part of another language, preventing Word from seeing this word as a mistake.
o If you select spelling, the Spelling and Grammar dialog box appears.
o If you select Look Up, a window opens in the Task Pane and you are given general search parameters. This feature is helpful when dealing with words, such as proper nouns, that are not found in the dictionary.
Word puts a red wavy line under possible spelling mistakes. If you click on the suspected misspelling, Word gives you one or more suggested corrections.
To Use Spell Check as You Type:
• Place your l-Beam over the misspelled word and right-click.
• A menu list displays the following options: boldfaced suggested spellings, Ignore All, Add to Dictionary, AutoCorrect, Language, Spelling and Look Up.
o Select the boldfaced suggestion to replace the incorrectly spelled word in the document.
o Select Ignore, and Word ignores all future instances of this spelling in this document.
o Select Add to Dictionary, and Word adds the underlined word to the dictionary so it won't be flagged as an error in any other document you create.
o Select AutoCorrect to add the correct spelling to your list of words that Word automatically corrects as you type.
o Select Language to specify a word as part of another language, preventing Word from seeing this word as a mistake.
o If you select spelling, the Spelling and Grammar dialog box appears.
o If you select Look Up, a window opens in the Task Pane and you are given general search parameters. This feature is helpful when dealing with words, such as proper nouns, that are not found in the dictionary.
Check Grammar as you Type
Word puts a green wavy line under possible grammar mistakes.
To Work on Suspected Grammatical Mistakes:
• Place your I-beam over the grammatical mistake and right-click.
• A menu list displays the following options: boldfaced grammar suggestion, Ignore, Grammar, About this Sentence.
o Select Ignore, and Word ignores the grammatical mistake it believes to exist.
o Select Grammar, and the Grammar dialog box appears.
o Select About this Sentence, and the Office Assistant will offer you reasons as to why Word believes this to be a grammatical error.
Spelling and Grammar Dialog Box

If the red and green wavy lines distract you, you can turn them off:
• Choose Tools Options from the menu bar. The Options dialog box appears.
• Click the Spelling & Grammar tab.
• Un-check the Check Spelling as You Type or Check Grammar as You Type so the check box so that it is empty.
• Click OK.
Don't forget to use Spell and Grammar Check!
To Use the Spelling and Grammar Dialog Box:
- Choose one of the following options, depending on what you think of Word's suggestions:
- Click Ignore Once to ignore this one instance of the grammatical error in your document.
- Click Ignore Rule to ignore this grammatical error and all other grammatical errors of this type in the document.
- Click Next Sentence to take you to the next grammatical error listed in your document.
- Click Change to replace the error with what is in the Suggestion box.
- Click Explain to open the Office Assistant, which will offer you reasons for this error.
If the red and green wavy lines distract you, you can turn them off:
• Choose Tools Options from the menu bar. The Options dialog box appears.
• Click the Spelling & Grammar tab.
• Un-check the Check Spelling as You Type or Check Grammar as You Type so the check box so that it is empty.
• Click OK.
Don't forget to use Spell and Grammar Check!
Did You Know?
Have you ever realized after typing a long paragraph that you accidentally left the Caps Lock on and all your letters are in Upper Case? Fortunately, you will not have to re-type the text to correct this mistake. Word offers a quick solution by allowing you to either select the Upper Case text and pressing Shift + F3 or clicking Format on the menu bar and selecting Change Case. Choose the correct option from the Change Case Dialog Box.
Have you ever realized after typing a long paragraph that you accidentally left the Caps Lock on and all your letters are in Upper Case? Fortunately, you will not have to re-type the text to correct this mistake. Word offers a quick solution by allowing you to either select the Upper Case text and pressing Shift + F3 or clicking Format on the menu bar and selecting Change Case. Choose the correct option from the Change Case Dialog Box.
Aligning Text
Aligning text can be invaluable when trying to format your document to meet certain standards. Most documents have text that is left aligned. However, if you were creating a greeting card or advertisement, you might need to know how to center align, right align or justify your text.
Align Text Using the Alignment Buttons:
• Select the text you want to align.
• Click the Align Left, Center, Align Right, or Justify button on the Formatting toolbar.
Aligning Text
Below you will view examples of text that are aligned using the left, right, center, and justified alignment buttons.
Line Spacing
Document text can be formatted to show a number of line spacing options. The most common spacing options are single-spaced and double-spaced.
Line spacing is measured in lines or points.
When line spacing is measured in points, it is referred to as leading (rhymes with wedding). When you reduce the leading you automatically bring the lines of text closer together, sometimes making it difficult to read. Increasing the leading will space the lines out, allowing for improved readability. For example, the 10 point font usually uses 12 point leading. This is the default and, in general, should be used.
To Format Line Spacing:
• Select the text you want to format.
• Choose Reveal Formatting on the Task Pane and click on any of the blue links under the Paragraph heading.
OR
• Click Format on the menu bar.
• Select Paragraph. The Paragraph dialog box appears.
• Click on the Indents and Spacing tab.
• In the Line spacing drop down menu, you may select single, 1.5, or double spacing. The default is single spacing.
• Click OK
OR
• Select the text you want to format.
• Click on the Line Spacing button on the Formatting Menu
• Select an option from the drop-down menu.


• Select the text you want to format.
• Choose Reveal Formatting on the Task Pane and click on any of the blue links under the Paragraph heading.
OR
• Click Format on the menu bar.
• Select Paragraph. The Paragraph dialog box appears.
• Click on the Indents and Spacing tab.
• In the Line spacing drop down menu, you may select single, 1.5, or double spacing. The default is single spacing.
• Click OK
OR
• Select the text you want to format.
• Click on the Line Spacing button on the Formatting Menu
• Select an option from the drop-down menu.
Paragraph Dialog Box
You can use the At Least, Exactly and Multiple options in the Paragraph Dialog Box to customize your line spacing. If you select one of these options you will need to use the At: box to further define your selection.

• When you make a line spacing change, it affects only the text in a paragraph that contains the insertion point
You can use the At Least, Exactly and Multiple options in the Paragraph Dialog Box to customize your line spacing. If you select one of these options you will need to use the At: box to further define your selection.
• When you make a line spacing change, it affects only the text in a paragraph that contains the insertion point
Paragraph Spacing
Just as you can add spacing between lines in your document, you can also choose spacing options between each paragraph. Typically, extra spaces are added between paragraphs, headings, or subheadings. Extra spacing between paragraphs adds emphasis and makes a document easier to read.
Choose extra space:
• Before each paragraph.
• After each paragraph.
• Or, before and after each paragraph.
To Specify Paragraph Spacing:
• Select the text you want to format.
• Choose Reveal Formatting on the Task Pane and click on any of the blue links under the Paragraph heading.
OR
• Click Format on the menu bar.
• Select Paragraph, The Paragraph dialog box appears.
• Click the Indents and Spacing tab.
- Alignment: Choose left, right, center, or justified.
- Indentation: Adjust the left and right margins by clicking the up and down arrows. Use the Special drop-down menu to select the first line as having the indent or to create a hanging indent.
- Spacing: To emphasize a block of text, click the up and down arrows.
- Preview: Gives an idea how your text will look.
Using Page Setup to Specify Margins

OR
• Choose Reveal Formatting on the Task Pane and click on the blue link. Margin, under the Section heading.
• You can change the margin in precise steps by clicking on the up or down arrows next to the margin that you wish to change or you may type a number in the text box next to the margin you wish to change.
• Click OK

In order to change the margins (space along the top, left, right and bottom) in your document, you will need to access the Page Setup dialog box.
• Click File on the menu bar.
• Select Page Setup.
• Select Margins tab in the Page Setup dialog box.
• Click File on the menu bar.
• Select Page Setup.
• Select Margins tab in the Page Setup dialog box.
OR
• Choose Reveal Formatting on the Task Pane and click on the blue link. Margin, under the Section heading.
• You can change the margin in precise steps by clicking on the up or down arrows next to the margin that you wish to change or you may type a number in the text box next to the margin you wish to change.
• Click OK
More Options on the Page Setup Dialog Box
The Page Setup dialog box gives you several other options for controlling the look of your document. Not only can you control how your document looks on screen, but you can also manage how your document will be printed. The Margins, Paper and Layout Tab all contain valuable tools.
Margins Tab
1. Click the Default button in the lower left corner of the Page Setup dialog box to set (or reset) Word's default margins.
2. You can choose to apply these new margins to the whole document or from this point forward by using the drop-down menu, Apply to:.
3. Change the Page Orientation by clicking on either the Portrait box (8.5 x 11) or the Landscape box (11 x 8.5).
Paper Tab
The default paper size is 8.5 x 11, but you can change the paper size entirely. You can even customize the paper size to include note cards, envelopes, photo paper, index cards, and much more.
Layout Tab
The Layout Tab includes options to customize page numbering, borders, and headers/footers. A nice feature on the Layout Tab is creating a Title Page for your document.
To Create a Title Page for Your Document:
• Enter the text you want on your title page.
• Click File on the Standard toolbar.
• Select Page Setup from the menu bar.
• Click the Layout tab.
• Under Vertical Alignment, you will find the following options:
- Top: Default. Text lines up with top margin.
- Center: Text on page is centered between the top and bottom margins.
- Justified: Text is spread out so each line is same distance apart.
- Bottom: Text lines up with the bottom page.
Indent Text
An indent is the space between your margin and your text. Don't confuse the margin and the indent. The indent feature is often used to set a first-line indent for paragraphs.
To Indent One or More Lines of Text:
• You can use the Paragraph dialog box or select the blue Indentation link under Paragraph on the Task Pane This method allows for a great amount of precision for setting left and right indents. Indenting is measured in inches. You can change the indent in tenths of inches.

• In the Indentation section, you can click the increment arrows to enter the amount of indentation.
OR
• Use the Increase/Decrease Indent buttons on the Formatting toolbar


Remember, there is a difference between indents and tabs. If you set a tab, only one line of text is indented. If you click one of the indent buttons or set an indent in the Paragraph dialog box, all of the text you type afterwards will be indented.
An indent is the space between your margin and your text. Don't confuse the margin and the indent. The indent feature is often used to set a first-line indent for paragraphs.
To Indent One or More Lines of Text:
• You can use the Paragraph dialog box or select the blue Indentation link under Paragraph on the Task Pane This method allows for a great amount of precision for setting left and right indents. Indenting is measured in inches. You can change the indent in tenths of inches.
• In the Indentation section, you can click the increment arrows to enter the amount of indentation.
OR
• Use the Increase/Decrease Indent buttons on the Formatting toolbar
- Clicking the Increase/Decrease Indent buttons is the most convenient way of setting a left or right indent Each time you click the Increase or Decrease Indent button your text is moved by the default .5 inches.
Remember, there is a difference between indents and tabs. If you set a tab, only one line of text is indented. If you click one of the indent buttons or set an indent in the Paragraph dialog box, all of the text you type afterwards will be indented.
Hanging Indents
When all the lines in a paragraph are indented except the first line, a hanging indent is created. Hanging indents are not standard in documents such as business letters, but you may see examples of the hanging indent on web pages, newsletters, and often on bibliographic entries. Hanging indents are used for the MLA bibliographic format.

To Create a Hanging Indent:
• Choose Reveal Formatting on the Task Pane
• Click the blue link, Indentation, under the Paragraph heading
OR
• Click Format on the menu bar.
• Select Paragraph.
• In the Indentation section, you will see a Special: drop down menu with some options.
• Select the Hanging Indent option in the Special: drop down menu.
• You may specify the amount of indentation in the By: box by clicking on the increment arrows. These increments are measured in inches

When all the lines in a paragraph are indented except the first line, a hanging indent is created. Hanging indents are not standard in documents such as business letters, but you may see examples of the hanging indent on web pages, newsletters, and often on bibliographic entries. Hanging indents are used for the MLA bibliographic format.
To Create a Hanging Indent:
• Choose Reveal Formatting on the Task Pane
• Click the blue link, Indentation, under the Paragraph heading
OR
• Click Format on the menu bar.
• Select Paragraph.
• In the Indentation section, you will see a Special: drop down menu with some options.
• Select the Hanging Indent option in the Special: drop down menu.
• You may specify the amount of indentation in the By: box by clicking on the increment arrows. These increments are measured in inches
Formatting Toolbar
The Formatting Toolbar contains buttons that allows you to change the appearance of your text. The formatting toolbar contains buttons for font size, font style, colors and other options. There are many different types of fonts. Some fonts are better used for business correspondence while others are great for fun projects like birthday cards. Your computer probably has twenty or more different fonts installed.
To View the Formatting Toolbar:
• Click View on the Menu Bar.
• Select Toolbars and then Formatting from the cascading menu.
Bold, Italics and Underline
Any text you type in Word, can be further customized by using the bold, italicized or underlined options. You can even do a combination of all three options!
To Change the Type Style of Text:
• Select the text you want to change.
• Choose one or more of the following options: (to stress emphasis you might want to try using the bold option)

To avoid frustration, remember to select text before you apply style. If you choose a type style without selecting any text, Word uses your chosen styles on whatever text you type next.
Font Names
To select a font, you can scroll through the Font list The list shows you all the fonts that are available on the computer you are using.
As you scroll through the many different font names, take notice of those fonts that have TT beside their name. These TrueType fonts will look the same on both the computer screen and when you print them on paper.
Any text you type in Word, can be further customized by using the bold, italicized or underlined options. You can even do a combination of all three options!
To Change the Type Style of Text:
• Select the text you want to change.
• Choose one or more of the following options: (to stress emphasis you might want to try using the bold option)
- Click the Bold button on the Formatting toolbar. Ctrl + B
- Click the Italic button on the Formatting toolbar Ctrl + I
- Click the Underline button on the Formatting toolbar. Ctrl + U
- Word automatically displays your changes.
To avoid frustration, remember to select text before you apply style. If you choose a type style without selecting any text, Word uses your chosen styles on whatever text you type next.
Font Names
To select a font, you can scroll through the Font list The list shows you all the fonts that are available on the computer you are using.
As you scroll through the many different font names, take notice of those fonts that have TT beside their name. These TrueType fonts will look the same on both the computer screen and when you print them on paper.
Using Color
The use of color can add emphasis to your words and make your document easier to read
If you own a color printer, you can print documents in different colors. If you do not own a color printer, your document will only appear in color on the screen.
To Change the Color of Text:
• Select the text you want to change.
• Click the downward-pointing arrow on the Font Color button on the Formatting toolbar. A color palette appears.
• Click the color you want to apply
• Word changes the color of your text.

If you would like to see more color options, Click the More Colors button at the bottom of the color palette. You can choose from a list of Standard Colors or Customize your own color by clicking the Customize Tab
The use of color can add emphasis to your words and make your document easier to read
If you own a color printer, you can print documents in different colors. If you do not own a color printer, your document will only appear in color on the screen.
To Change the Color of Text:
• Select the text you want to change.
• Click the downward-pointing arrow on the Font Color button on the Formatting toolbar. A color palette appears.
• Click the color you want to apply
• Word changes the color of your text.
If you would like to see more color options, Click the More Colors button at the bottom of the color palette. You can choose from a list of Standard Colors or Customize your own color by clicking the Customize Tab
Font Dialog Box
The Font Dialog Box gives similar options as the Formatting toolbar; however, it also offers more advanced text features. You can use the Font Dialog Box to change your font, font style, size, color and many other font effects.
To Open the Font Dialog Box:
• Click Format on the Menu Bar
• Select Font from the menu list. The Font Dialog Box will appear.

Remember you can also access the Font Dialog Box from the Font menu on the Task Pane

The Font Dialog Box gives similar options as the Formatting toolbar; however, it also offers more advanced text features. You can use the Font Dialog Box to change your font, font style, size, color and many other font effects.
To Open the Font Dialog Box:
• Click Format on the Menu Bar
• Select Font from the menu list. The Font Dialog Box will appear.
Remember you can also access the Font Dialog Box from the Font menu on the Task Pane
Font Size
You can change the Font Size from both the Font Dialog Box and the Formatting toolbar You can use different font sizes to give emphasis to different parts of your document. For example, the title of your document could be displayed larger than the contents of your paper. Font size is commonly expressed in points. Font sizes range from 8 point (extremely small) to 72 point (very big). Word allows you to choose sizes smaller than 8 point and larger than 72 point, but you must type these in manually in the Font Size box.
Arial 10 Point
Arial 12 Point
Arial 20 Point
Arial 30 Point
The standard Font size for most documents is 12 Point. You can preview different font sizes in the Preview window in the Font dialog box.
• Select Reveal Formatting on the Task Pane.
• Click the blue link, Font: under the Font Heading. The Font dialog box appears.
• Click on a font from the Font list.
• Select a size from the Font Size list.
• Look at the text in the preview window as you try different sizes.
OR
• Click Format on the Menu Bar.
• Select Font from the menu list. The Font dialog box appears.
• Click on a font from the Font list.
• Select a size from the Font Size list.
• Look at the text in the preview window as you try different sizes.
- Remember you can also change the font size from the Formatting toolbar.
Did You Know?
Word offers a variety of Templates that provide you with a pre-formatted document. Instead of having to create formats yourself, you can quickly choose among a variety of Templates.
To Open the Templates Dialog Box:
• Click File on the Menu Bar.
• Select New from the menu list The Task Pane New Document window appears to the right.
• Select an option under New from template.
- Letter Wizard - assists you in writing a standard letter
- Contemporary Letter - offers a letter template including artwork
- General Templates - preformatted documents including faxes, letters, memos, reports, etc.
- Templates on my Web Sites - allows you to search for templates on other web servers
- Templates on Microsoft.com - allows you to search among hundreds of templates offered through the Microsoft website
Bullets and Numbering
Word lets you make two types of lists: bulleted and numbered. Bulleted and numbered lists help to simplify steps or items to the reader. Teachers often use bulleted lists to highlight important pieces of their lessons. Manuals often include numbered lists to assist the reader in step-by-step instruction.
A bullet is usually a black circle but it can be any other symbol used to highlight items in a list. Use bullets to list items that do not have to be in any particular order.
Numbers (or letters) are used when information has to be in a certain order. You can use the default Bullets and Numbering settings by clicking on the appropriate button on the Formatting toolbar
Create Bulleted and Numbered Lists
To Create a Bulleted List:

To Create a Numbered List:

• Remove a bullet by placing the insertion point to the right of the bullet or number and press backspace (you will not be able to place your insertion point to the left of the bullet).
• If you want to change a bulleted list to a numbered list (or vice versa), select the entire list and click on the appropriate button.
• To create a line break between items in a bulleted or numbered list, place your cursor where you want the line break and press Shift + Enter
To Create a Bulleted List:
- Click the Bullets button on the Formatting toolbar
- Type the first item on your list and press Enter
- The next line will begin automatically with a new bullet.
- Type the next item on your list and press Enter.
- When your list is complete, press the Enter key twice to stop the bulleted list
To Create a Numbered List:
- Click on the Numbering button on the Formatting toolbar
- Type the first item on your list and press Enter
- The next line will begin automatically with the next number.
- Type the next item on your list and press Enter.
- When your list is complete, press the Enter key twice to stop the numbered list
• Remove a bullet by placing the insertion point to the right of the bullet or number and press backspace (you will not be able to place your insertion point to the left of the bullet).
• If you want to change a bulleted list to a numbered list (or vice versa), select the entire list and click on the appropriate button.
• To create a line break between items in a bulleted or numbered list, place your cursor where you want the line break and press Shift + Enter
The Bullets and Numbering Dialog Box
Word offers you many other options for your bullets and numbers, other than the default that you have seen so far.
You can view the type of bullets and numbers available to you by opening the Bullets and Numbering Dialog Box

Word offers you many other options for your bullets and numbers, other than the default that you have seen so far.
You can view the type of bullets and numbers available to you by opening the Bullets and Numbering Dialog Box
- Select the text you want to turn into a list.
- Click Format on the Menu Bar.
- Select Bullets and Numbering The Bullets and Numbering Dialog Box appears.
- Click on the Bulleted Tab to view all the bullet options and click on the Numbered Tab to view all the number options.
- Select what kind of bullets or numbers that you want, and click OK.
Use of Symbols
There are many Symbols that you might often see in publications that are not directly available from your keyboard. For example, the Copyright symbol, ©, is not available on the keyboard but can be selected from Word's Symbol Dialog Box
Other commonly used symbols that appear in the Symbol Dialog Box are
• © Copyright
• ® Registration
• ™Trademark
• Checkmark
• - Em Dash
Insert Symbols
To Insert Symbols into your Document:
• Click Insert on the Menu Bar.
• Select Symbols. The Symbols Dialog Box appears
• Click the Symbols Tab to select a symbol from a Font type.
OR
• Click the Special Characters Tab to view other commonly used symbols.
• Click on the Symbol or Special Character you would like to select and then Click Insert
• The Symbol or Character will show up in your document.
• Click Close.
- The available symbols will depend on which fonts you have installed on your machine. Word comes with pre-installed symbols for you use, but other fonts such as, Wingdings, will also offer numerous symbol options.
Before You Start the Challenge...
During the challenges for these lessons, you will create a newsletter or flyer. Before you begin, decide which topic you would like to write about.
• Do you want to design a flyer that advertises a room for rent?
• Perhaps you want to develop a flyer that promotes a service, such as piano or guitar lessons?
• Do you want to develop a newsletter for an organization you are a member of?
There are many templates in Microsoft Word 2003 that can help you create these documents, but for this tutorial you will find it more educational if you complete the assignment without using the template feature. Make a decision about what you want your document to be about and we'll get started!
Insert Headers and Footers
The Header and Footer usually contain title and author information, dates, and page numbers. The Header appears at the top of the page and the Footer appears at the bottom of the page.
To Insert a Header and Footer:
• Click View on the Menu Bar.
• Select Header and Footer
• The document will appear grayed out with a dotted Header and Footer box showing at the top and bottom of the page.
• Locate the Header and Footer Toolbar on the page.

• Type inside the dotted boxes to insert your Header and/or Footer
• Click Close on the Header and Footer Toolbar when you are finished.

and

The Header and Footer usually contain title and author information, dates, and page numbers. The Header appears at the top of the page and the Footer appears at the bottom of the page.
To Insert a Header and Footer:
• Click View on the Menu Bar.
• Select Header and Footer
• The document will appear grayed out with a dotted Header and Footer box showing at the top and bottom of the page.
• Locate the Header and Footer Toolbar on the page.
• Type inside the dotted boxes to insert your Header and/or Footer
• Click Close on the Header and Footer Toolbar when you are finished.
and
Header and Footer Toolbar
The Header and Footer Toolbar contains buttons that can help you automatically enter important information in your header and footers.
Some of the useful features located on the Header and Footer Toolbar are:
• Insert Auto-Text - drop-down menu showing commonly used header and footer information, including, author, page number and date.
• Insert Page Numbers - inserts the page numbers.
• Insert Number of Pages - inserts the number of pages in the entire document.
• Format Page Number - opens the Page Number Format Dialog box so that you can format your page number in the header and footer.
• Insert Date
• Insert Time
• Page Setup - opens the Page Setup Dialog box so that you can adjust the location of the header and footer.
• Switch between Header and Footer - allows you to jump quickly between the header and footer on a page.
• Close - closes the Header and Footer Toolbar
Delete Header and Footer
If you choose to delete your Header or Footer, Word will automatically delete the Header or Footer within the entire document.
To Delete the Header or Footer:
• Click View on the Menu Bar.
• Select Header and Footer
• Highlight the text within the Header or Footer (whichever text you would like to delete)
• Press Delete. The text is now removed.
• Click Close.
- You can delete the Header and Footer on just the first page of the document by choosing File - Page Setup. On the Page Setup Dialog Box, choose the Layout Tab and place a checkmark next to Different First Page under Headers and Footers, then click OK.
Why display non-printing characters?
Non-printing characters are automatically inserted into your document as you type. You will not see these characters unless you choose to show the formatting marks. So why display these characters? Showing the document formatting can assist you when editing. Non-printing characters such as spaces, tabs, and hard returns (created when you press the Enter key), will now be visually displayed on your page.
For example:
A document that was created with numerous tabs could be quite difficult to edit if you needed to delete all the tabs. However, if you display your non-printing characters, you will be able to quickly see where all the tabs
exist. The tab symbol will appear as an arrow pointing to the right, ~*. Place the insertion point to the right of the tab symbol and press the Backspace key to quickly delete these tabs.
To Reveal Formatting Marks:
• Click the Show/Hide button on the Standard Toolbar
OR
• Select the Reveal Formatting Menu from the Task Pane.
• Check the Show all formatting marks checkbox at the bottom of the Menu under Options


When you select the Show/Hide button, codes for paragraph marks 1, tabs ~*, and spaces . are visible in your document. If you prefer to display non-printing characters when formatting your document, these symbols will not appear in your printed document.
• Click the Show/Hide button on the Standard Toolbar
OR
• Select the Reveal Formatting Menu from the Task Pane.
• Check the Show all formatting marks checkbox at the bottom of the Menu under Options
When you select the Show/Hide button, codes for paragraph marks 1, tabs ~*, and spaces . are visible in your document. If you prefer to display non-printing characters when formatting your document, these symbols will not appear in your printed document.
Create a Text Box
Placing text inside of a Text Box helps focus the reader's eye on the page content. Newsletters, flyers, reports, announcements, school projects, or other types of publications, often use Word's text box feature.
Text boxes can be formatted with shadings, color, borders, and graphics, making for an impressive display of your Word skills.
To Create a Text Box:
• Click Insert on the Menu Bar.
• Select Text Box from the menu list.
• The mouse pointer becomes a +crosshair and a drawing canvas appears.
• Place your insertion point where you want your text box.
• Left click and drag the text box until it is the appropriate size. Release the left mouse button when ready.
• The text box will by default contain a white background color and a thin black border.

Note: When you create a text box in Word 2003, the drawing canvas appears by default. The canvas helps you arrange and resize the objects you are working with.
To Insert Text into the Text Box:
• Click once inside the text box.
• The box is selected and a blinking insertion point appears inside the box.
• Begin typing.
• Format text (change font, font size, style, etc) in the usual manner. (Select text first, make changes later.)
Placing text inside of a Text Box helps focus the reader's eye on the page content. Newsletters, flyers, reports, announcements, school projects, or other types of publications, often use Word's text box feature.
Text boxes can be formatted with shadings, color, borders, and graphics, making for an impressive display of your Word skills.
To Create a Text Box:
• Click Insert on the Menu Bar.
• Select Text Box from the menu list.
• The mouse pointer becomes a +crosshair and a drawing canvas appears.
• Place your insertion point where you want your text box.
• Left click and drag the text box until it is the appropriate size. Release the left mouse button when ready.
• The text box will by default contain a white background color and a thin black border.
Note: When you create a text box in Word 2003, the drawing canvas appears by default. The canvas helps you arrange and resize the objects you are working with.
To Insert Text into the Text Box:
• Click once inside the text box.
• The box is selected and a blinking insertion point appears inside the box.
• Begin typing.
• Format text (change font, font size, style, etc) in the usual manner. (Select text first, make changes later.)
Moving and Resizing Text Boxes
To Resize a Text Box:
• Click once on one of the box's borders. The box is now highlighted.

• Sizing handles (small circles) appear. Hover the mouse pointer over any of the sizing handles (small circles) until it turns into a diagonally pointing arrow.

• Click and drag the sizing handle until the box is the desired size.
To Move a Text Box:
• Click once on the text box's border.
• Hover your mouse pointer over the border until it becomes a crosshair with arrows.
• Using this crosshair, click and drag the box until it is in the desired location.
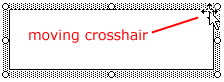
To Resize a Text Box:
• Click once on one of the box's borders. The box is now highlighted.
• Sizing handles (small circles) appear. Hover the mouse pointer over any of the sizing handles (small circles) until it turns into a diagonally pointing arrow.
• Click and drag the sizing handle until the box is the desired size.
To Move a Text Box:
• Click once on the text box's border.
• Hover your mouse pointer over the border until it becomes a crosshair with arrows.
• Using this crosshair, click and drag the box until it is in the desired location.
The Format Text Dialog Box
As mentioned earlier, the default for the text box in Word is a white background with a thin, black border. Using the Format Text Box dialog box, you can choose different fill colors and lines, size, layout, and textbox.

To Use the Format Text Box Dialog Box:
• Double click on a text box border. The Format Text Box dialog box appears.
OR
• Right-click on the text box border and select Format Text Box. The Format Text Box dialog box appears.
You can access the Text box feature from the Drawing toolbar.
• Click View on the Menu Bar.
• Select Toolbar and then Drawing from the cascading menu. The Drawing toolbar appears at the bottom of your document.
• Click the Text box button

Don't confuse this button with the Rectangle button. You cannot insert text using the Rectangle button

• The Text Box Dialog Box offers you several tabs to choose from:
As mentioned earlier, the default for the text box in Word is a white background with a thin, black border. Using the Format Text Box dialog box, you can choose different fill colors and lines, size, layout, and textbox.
To Use the Format Text Box Dialog Box:
• Double click on a text box border. The Format Text Box dialog box appears.
OR
• Right-click on the text box border and select Format Text Box. The Format Text Box dialog box appears.
You can access the Text box feature from the Drawing toolbar.
• Click View on the Menu Bar.
• Select Toolbar and then Drawing from the cascading menu. The Drawing toolbar appears at the bottom of your document.
• Click the Text box button
Don't confuse this button with the Rectangle button. You cannot insert text using the Rectangle button
• The Text Box Dialog Box offers you several tabs to choose from:
- Color and Lines: Fill text box with color, define the border colors, styles and weight
- Size: Define a specific size
- Layout: Text wrap and alignment
- Textbox: Internal margins
Working with Columns
Displaying information in columns gives the writer more options for displaying different types of information on a page while remaining easy for the viewer to read. Certain kinds of information are best displayed using columns. Newspaper, newsletters, flyers, reports, announcements, school projects, or other types of publications, often use Word's column feature.
Below is an example of a Newsletter using columns and a graphic:

Working with columns can be challenging, but with practice, you'll have columns mastered in no time. An approach we will first try will be to enter text into a single column and then convert it into multiple columns.
Displaying information in columns gives the writer more options for displaying different types of information on a page while remaining easy for the viewer to read. Certain kinds of information are best displayed using columns. Newspaper, newsletters, flyers, reports, announcements, school projects, or other types of publications, often use Word's column feature.
Below is an example of a Newsletter using columns and a graphic:
Working with columns can be challenging, but with practice, you'll have columns mastered in no time. An approach we will first try will be to enter text into a single column and then convert it into multiple columns.
Create Columns Using the Columns Button:
• Switch to Print Layout View

• To make equal columns, move the insertion point to the end of the text and insert a continuous section break by choosing Insert - Break-Continuous

• Select the text you want to change to columns.
• Click the Columns Button on the Standard Toolbar.
• The Columns Button will expand to give you four column options:

• Choose one of the options to format your text into columns
You can adjust the spacing and alignment of the columns by using the ruler. Drag the Right Margin, Left Margin and Right Indent using your mouse until the columns appear the way you want.

To Enter a Title that Spans a Column:
• Enter the title at the beginning of the first column.
• Select the title.
• Click the Columns button on the Standard toolbar, and drag to select number of columns.
• Switch to Print Layout View
• To make equal columns, move the insertion point to the end of the text and insert a continuous section break by choosing Insert - Break-Continuous

• Select the text you want to change to columns.
• Click the Columns Button on the Standard Toolbar.
• The Columns Button will expand to give you four column options:
• Choose one of the options to format your text into columns
You can adjust the spacing and alignment of the columns by using the ruler. Drag the Right Margin, Left Margin and Right Indent using your mouse until the columns appear the way you want.
To Enter a Title that Spans a Column:
• Enter the title at the beginning of the first column.
• Select the title.
• Click the Columns button on the Standard toolbar, and drag to select number of columns.
Creating Columns Using the Columns Dialog Box
Using the Column Dialog Box versus the Columns Button will give you much more control and precision over your column structure. The Columns Dialog Box will also give you a few more column options, including Left and Right columns as well as the ability to create up to eight columns per page.
Using the Column Dialog Box:
• Switch to Print Layout View
• To make equal columns, move the insertion point to the end of the text and insert a continuous section break by choosing Insert Break Continuous
• Select the text you want to change to columns.
• Click Format on the Menu Bar
• Select Columns from the menu list. The Columns Dialog Box appears.

The Column Dialog Box gives you the following options:
• Presets - Click a box to choose a preset number of columns
• Number of Columns - Use the up and down arrow keys to select between one and eight columns
• Line Between -Places lines between your columns
• Width and Spacing - Offers features that allow you to specify an exact number for the height and width of your columns, as well as the spacing between your columns.
• Equal Column Width - Check this checkbox if you want columns to be the same width
• Apply to: - Allows you to create columns out of the selected text, the selected section, this point forward, or the entire document
• Select your options and Click OK.
To Move Text into the Next Column:
• Move the insertion point in front of the text you want to move.
• Choose Format > Columns. The Columns dialog box opens.
• Choose "From this point forward" in the Apply to: control.
• Click the Start New Column check box to move the text to the next column
Using the Column Dialog Box versus the Columns Button will give you much more control and precision over your column structure. The Columns Dialog Box will also give you a few more column options, including Left and Right columns as well as the ability to create up to eight columns per page.
Using the Column Dialog Box:
• Switch to Print Layout View
• To make equal columns, move the insertion point to the end of the text and insert a continuous section break by choosing Insert Break Continuous
• Select the text you want to change to columns.
• Click Format on the Menu Bar
• Select Columns from the menu list. The Columns Dialog Box appears.
The Column Dialog Box gives you the following options:
• Presets - Click a box to choose a preset number of columns
• Number of Columns - Use the up and down arrow keys to select between one and eight columns
• Line Between -Places lines between your columns
• Width and Spacing - Offers features that allow you to specify an exact number for the height and width of your columns, as well as the spacing between your columns.
• Equal Column Width - Check this checkbox if you want columns to be the same width
• Apply to: - Allows you to create columns out of the selected text, the selected section, this point forward, or the entire document
• Select your options and Click OK.
To Move Text into the Next Column:
• Move the insertion point in front of the text you want to move.
• Choose Format > Columns. The Columns dialog box opens.
• Choose "From this point forward" in the Apply to: control.
• Click the Start New Column check box to move the text to the next column
Working with Tables
Tables allow large amounts of text and/or numbers to be presented in an organized and easy to read fashion. Student roll books, sport statistics, address books, math formulas, menus and many other documents often incorporate tables to share information.
Similar to columns, Tables can be challenging at first. Word has created an entire menu to help assist you in creating your first Table.
A few important terms to know before you begin creating tables are:
Row - A row runs horizontal in a table and is divided by borders.
Borders - Separating lines in the table.
Column - A column runs perpendicular in a table and is divided by borders.
Cell - A cell is the box that is created when your rows and your columns intersect each other. The cell contains
your data or information.
Creating Tables Using the Insert Table Dialog Box:
• Click Table on the Menu Bar
• Select Insert and then Table from the cascading menu. The Insert Table dialog box appears.
• Determine the number of columns and rows you need in your table. You can add more later, but save yourself some work. You can always add rows by pressing Tab at the end of a row.
• To create a table as wide as your page, leave the Fixed Column Width setting on Auto.
• Click OK. A table is inserted into your document.
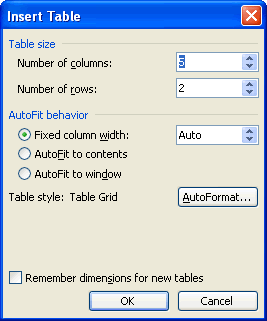
Another automated way to create a quick table is by using the Insert Table Button on the Standard toolbar
Creating Tables Using the Insert Table Button:
• Click the Insert Table Button

• Now, drag the number of columns and rows you want in your table.

• Click Table on the Menu Bar
• Select Insert and then Table from the cascading menu. The Insert Table dialog box appears.
• Determine the number of columns and rows you need in your table. You can add more later, but save yourself some work. You can always add rows by pressing Tab at the end of a row.
• To create a table as wide as your page, leave the Fixed Column Width setting on Auto.
• Click OK. A table is inserted into your document.
Another automated way to create a quick table is by using the Insert Table Button on the Standard toolbar
Creating Tables Using the Insert Table Button:
• Click the Insert Table Button
• Now, drag the number of columns and rows you want in your table.
Custom-Made Tables
The Insert Table Dialog Box and Insert Table button offer a quick solution to making tables. If you would like to custom create your table by drawing it yourself, you can use the Draw Table button.
Creating Tables Using the Draw Tables Button:
• Open the Tables and Borders toolbar by clicking View on the Menu Bar, Select Toolbars and then Tables and Borders from the Cascading Menu. The Tables and Borders toolbar will appear.
• Click the Draw Tables button on the Tables and Borders toolbar. The mouse pointer turns into a pencil.

• Drag the pencil to create a rectangle about the size of the table you want.
• Release the mouse button. The border of the table appears in your document.
• Use the pencil again to draw in column and row borders.
• Click the Draw Table button again to change the pencil back into an I-beam.
If you make a mistake while drawing your table, you can erase both rows and columns by using the Eraser on the Tables and Borders toolbar. Once you select the Eraser, the pointer will change to resemble the Eraser
Button..^ Drag the Eraser over parts of the table you wish to erase. When you are finished erasing, click the Eraser button again to put the Eraser away.
The Insert Table Dialog Box and Insert Table button offer a quick solution to making tables. If you would like to custom create your table by drawing it yourself, you can use the Draw Table button.
Creating Tables Using the Draw Tables Button:
• Open the Tables and Borders toolbar by clicking View on the Menu Bar, Select Toolbars and then Tables and Borders from the Cascading Menu. The Tables and Borders toolbar will appear.
• Click the Draw Tables button on the Tables and Borders toolbar. The mouse pointer turns into a pencil.
• Drag the pencil to create a rectangle about the size of the table you want.
• Release the mouse button. The border of the table appears in your document.
• Use the pencil again to draw in column and row borders.
• Click the Draw Table button again to change the pencil back into an I-beam.
If you make a mistake while drawing your table, you can erase both rows and columns by using the Eraser on the Tables and Borders toolbar. Once you select the Eraser, the pointer will change to resemble the Eraser
Button..^ Drag the Eraser over parts of the table you wish to erase. When you are finished erasing, click the Eraser button again to put the Eraser away.
Entering Text
Click inside any table cell to begin entering text or numbers.

Moving Around in a Table:
• Use the Tab key or right arrow key to move right.
• Use Shift + Tab or the left arrow key to move left.
• The up and down arrow keys will move the insertion point above or below its current location.
Selecting Text in Tables:
A cell: triple click inside cell.
A row: Move mouse to left of margins, point to the row, and click.
Multiple rows: Select the first row, click and drag the number of rows desired.
A column: Move the mouse above the column. It turns into a downward pointing arrow. Click once.
Multiple columns: Select the first column, click and drag the number of columns desired.
Entire Table Choose Table and Select Table from the menu bar.
Click inside any table cell to begin entering text or numbers.
Moving Around in a Table:
• Use the Tab key or right arrow key to move right.
• Use Shift + Tab or the left arrow key to move left.
• The up and down arrow keys will move the insertion point above or below its current location.
Selecting Text in Tables:
A cell: triple click inside cell.
A row: Move mouse to left of margins, point to the row, and click.
Multiple rows: Select the first row, click and drag the number of rows desired.
A column: Move the mouse above the column. It turns into a downward pointing arrow. Click once.
Multiple columns: Select the first column, click and drag the number of columns desired.
Entire Table Choose Table and Select Table from the menu bar.
Editing Tables
Once you have created your table, you may find that you need to format text within your table, insert or delete rows and columns, or perhaps just change the appearance of your table so that it is more visually appealing.
Formatting Text in Tables
Fortunately, whatever you do to format text in a paragraph (make it bold green, for example), you can do to text in a table cell. Formatting text within a table can be accomplished through a variety of means, including the Formatting menu, the Tables and Borders toolbar, the Task Pane and keyboard shortcuts
Rotating Text in Tables
Many advertisements, for sale signs, menus, and other creative documents use Word's text direction feature to change typical horizontal text to eye-catching vertical text. You can rotate text so it runs vertically, facing either the right or the left.
To Rotate Text in a Table Cell:
• Select the cell(s) you want to rotate.
• Click the Change Text Direction button on the Tables and Borders toolbar

• Clicking the Change Text Direction button once turns text to the vertically left, the second click turns text to vertically right, and the third click will bring your text back to a horizontal position.

Once you have created your table, you may find that you need to format text within your table, insert or delete rows and columns, or perhaps just change the appearance of your table so that it is more visually appealing.
Formatting Text in Tables
Fortunately, whatever you do to format text in a paragraph (make it bold green, for example), you can do to text in a table cell. Formatting text within a table can be accomplished through a variety of means, including the Formatting menu, the Tables and Borders toolbar, the Task Pane and keyboard shortcuts
Rotating Text in Tables
Many advertisements, for sale signs, menus, and other creative documents use Word's text direction feature to change typical horizontal text to eye-catching vertical text. You can rotate text so it runs vertically, facing either the right or the left.
To Rotate Text in a Table Cell:
• Select the cell(s) you want to rotate.
• Click the Change Text Direction button on the Tables and Borders toolbar
• Clicking the Change Text Direction button once turns text to the vertically left, the second click turns text to vertically right, and the third click will bring your text back to a horizontal position.
- The insertion point rotates when entering vertical text, but editing vertical text is really no different than editing horizontal text.
Inserting and Deleting Columns and Rows
Estimating how many rows and columns you will need in a table is not always easy. Therefore, it is important to know how to insert and delete rows and columns in your existing table.
To Add Rows to Your Table:
• Move the insertion point to the last cell in the table and press Tab.
To Insert Rows in the Middle of the Table:
• Place the insertion point anywhere in the table.
• Choose Table ~* Insert ~* Rows above OR Rows below.
To Delete Rows:
• Select the row(s) you want to delete.
• Choose Table ~* Delete ~* Rows.
OR
• Right-click and choose Table ~* Delete ~* Rows from the shortcut menu
To Delete Single Table Cell:
• Place the insertion point inside the cell you wish to delete.
• Choose Table .... Delete .....Cells from the menu bar. The Delete Cells dialog box appears.
• Click Shift cells left, Shift cells up, Delete entire row, or Delete entire column.
To Insert a Column:
• Position the mouse pointer where you want to column to be located.
• Choose Table ..... Insert ..... Insert Columns to the Right or Insert Columns to the Left.
Resizing Tables
You may need to adjust the size of columns, rows, and cells.
To Adjust Columns, Rows, and Cell Size:
• Hover the insertion point over any line in your table that borders the area you want to change.
• The insertion point changes to a double-headed arrow.
• Drag the border either left or right OR up and down.

Just as Word offers document templates for memos, faxes, reports and other items; Word also offers templates for Tables.
To use AutoFormat:
• Create your table.
• Click anywhere in the table. Go to the toolbar and select Table and then Table AutoFormat. The Table AutoFormat dialog box appears.
• Scroll through the Table Styles until you find a table you like. You can preview the Table Style in the Preview Box
• Check and uncheck the options in the Apply special Formats to: sections to slightly change parts of your table. Check out your changes using the Preview box.
• Click the New button to customize your own Table Style.
• Click the Modify button to change parts of an existing Table Style.
• Click OK.

You may need to adjust the size of columns, rows, and cells.
To Adjust Columns, Rows, and Cell Size:
• Hover the insertion point over any line in your table that borders the area you want to change.
• The insertion point changes to a double-headed arrow.
• Drag the border either left or right OR up and down.
- 'To automatically adjust the size, select the entire Table and then choose Table.... AutoFit ..... AutoFit to Contents.
Just as Word offers document templates for memos, faxes, reports and other items; Word also offers templates for Tables.
To use AutoFormat:
• Create your table.
• Click anywhere in the table. Go to the toolbar and select Table and then Table AutoFormat. The Table AutoFormat dialog box appears.
• Scroll through the Table Styles until you find a table you like. You can preview the Table Style in the Preview Box
• Check and uncheck the options in the Apply special Formats to: sections to slightly change parts of your table. Check out your changes using the Preview box.
• Click the New button to customize your own Table Style.
• Click the Modify button to change parts of an existing Table Style.
• Click OK.
Adding Borders
Many of the tables in the AutoFormat Dialog Box use unique borders and shading options. To add these special features to your own table, you can use the Tables and Borders toolbar.
To Change Line Style or Line Weight on an Existing Table:
• Click the drop down arrows (next to the buttons) to view and select from the list of choices.
• The mouse pointer turns into a pencil

• Trace the line(s) you want to change.
• Click anywhere outside the table to change to pencil back into the I-beam.
To Change the Border Color on an Existing Table:
• Click the drop down arrow next to the Border Color button. A color menu appears.
• Select a color. The I-beam becomes the pencil.
• Using the pencil, trace the border(s) that you want to color.

To Apply a Border:
• Select the Line Style, Line Weight, and Border Color you would like.
• Select the cells you want bordered.
• Click the Outside Border button drop down menu and choose the location of your border.

Many of the tables in the AutoFormat Dialog Box use unique borders and shading options. To add these special features to your own table, you can use the Tables and Borders toolbar.
To Change Line Style or Line Weight on an Existing Table:
• Click the drop down arrows (next to the buttons) to view and select from the list of choices.
• The mouse pointer turns into a pencil
• Trace the line(s) you want to change.
• Click anywhere outside the table to change to pencil back into the I-beam.
To Change the Border Color on an Existing Table:
• Click the drop down arrow next to the Border Color button. A color menu appears.
• Select a color. The I-beam becomes the pencil.
• Using the pencil, trace the border(s) that you want to color.
To Apply a Border:
• Select the Line Style, Line Weight, and Border Color you would like.
• Select the cells you want bordered.
• Click the Outside Border button drop down menu and choose the location of your border.
Add Shading
To Apply Shading:
• Select or place the insertion point inside the cell(s) you want shaded.
• Click the Shading Color button drop down arrow. A shading color menu appears
• Click on a color. Your cell(s) are automatically shaded.

To Apply Shading:
• Select or place the insertion point inside the cell(s) you want shaded.
• Click the Shading Color button drop down arrow. A shading color menu appears
• Click on a color. Your cell(s) are automatically shaded.
Introduction to Word Graphics
Now that you are comfortable adding and formatting text, headers and footers, columns, and tables, let's learn to enhance your documents by adding objects and pictures.
The Drawing Toolbar offers many options for including lines, lines with arrows, and many types of shapes into your document.
Drawing objects include:
1. AutoShapes: including Lines, Curves, and Textboxes
2. WordArt drawing objects
Drawing Objects
To Draw Lines and Shapes:
• Open the Drawing toolbar by clicking View on the Menu Bar, Select Toolbars and then Drawing from the Cascading Menu.
OR
• Right-click on any toolbar and select drawing.
OR
• Click the Drawing button on the Standard toolbar.
• The Drawing toolbar will appear.


• Choose an AutoShape from the AutoShape drop down menu
OR
• Click any of the drawing tools in the first group of buttons.
 o Line Tool -
 o Arrow Tool -
 o Rectangle Tool -
 o Oval Tool -
 • The mouse pointer changes to a crosshair
• Drag the crosshair from a starting point until the object is the desired size.
• Release the mouse button to end the drawing object and turn off the Drawing tool.
• Hold the Shift key down to create straight lines, perfect circles, or perfect squares.
• AutoShapes are inserted (on their own layer) with the In front of text wrapping style applied.
To Draw Lines and Shapes:
• Open the Drawing toolbar by clicking View on the Menu Bar, Select Toolbars and then Drawing from the Cascading Menu.
OR
• Right-click on any toolbar and select drawing.
OR
• Click the Drawing button on the Standard toolbar.
• The Drawing toolbar will appear.
• Choose an AutoShape from the AutoShape drop down menu
OR
• Click any of the drawing tools in the first group of buttons.
• Drag the crosshair from a starting point until the object is the desired size.
• Release the mouse button to end the drawing object and turn off the Drawing tool.
• Hold the Shift key down to create straight lines, perfect circles, or perfect squares.
• AutoShapes are inserted (on their own layer) with the In front of text wrapping style applied.
Word Art Drawing Objects
Also included on the Drawing toolbar is the WordArt Feature Using WordArt, you can create text graphics that bend, slant, and appear metallic or wooden and much, much more. WordArt can even be shadowed, skewed, rotated, and stretched.
Here are just a few examples of what WordArt allows you to do:

To Insert WordArt:
• Place the insertion point where you would like to insert WordArt.
 • Click the WordArt button on the Drawing toolbar The WordArt gallery opens

• Choose (click) a WordArt style.
• The Edit WordArt Text dialog box appears.
• Edit the font, size, and style.
• Click OK

Also included on the Drawing toolbar is the WordArt Feature Using WordArt, you can create text graphics that bend, slant, and appear metallic or wooden and much, much more. WordArt can even be shadowed, skewed, rotated, and stretched.
Here are just a few examples of what WordArt allows you to do:
To Insert WordArt:
• Place the insertion point where you would like to insert WordArt.
• Choose (click) a WordArt style.
• The Edit WordArt Text dialog box appears.
• Edit the font, size, and style.
• Click OK
Formatting Drawing Objects
Use the Drawing toolbar to format AutoShapes and WordArt.
 To select several objects hold down the Shift key and click on each object, or use the Select Objects tool.
 Fill color allow you to color all selected drawing objects. No fill is the color white.
 Change the line color of a selected object.
 Changes the text color of a selected object.
 Changes the line style of a selected object.
 Changes the line style of a selected object. Includes solid and dotted lines.
 Changes the style of arrow.
 Gives selected object some depth.
 Gives selected object a 3D effect.
Use the Drawing toolbar to format AutoShapes and WordArt.
Inserting Clip Art
Word comes bundled with hundreds of Clip Art images that are copyright free and available for your personal use. The clip art images that are available through Word cover many different categories and can really help enhance your pages. If you have never inserted clip art before, Word will ask if you would like to catalog all of the available resources (clip art, sound and video files) on your computer It is a good idea to go ahead and catalog all of these free resources.
To Insert Clip Art:
• Place the insertion point where you want to insert the clip.
• Click Insert on the Menu Bar.
• Select Picture and then Clip Art from the cascading menu. The Insert Clip Art menu opens on the Task Pane
• Type a keyword in the Search Text: field.
• Click Search
and
• Specify your search by using the Other Search Options
o Search in: - specifies where Word will search for clip art. As long as the check box for Everywhere is checked, Word will search through All Collections.
o Results should be: - specified what type of file Word will search for (video, audio, photographs, clip art). As long as the check box for All Media Types is checked, Word will search through All Media Files
• Double-click the clip art or picture to add to the document.

 •'To change your Search For text: Click the Modify button below the clip art results
To preview video and sound clips, click the appropriate tab and click the Play button to preview the file.
To Delete a Picture:
• Select the image (click on it).
• Press the delete key on your keyboard.
Word comes bundled with hundreds of Clip Art images that are copyright free and available for your personal use. The clip art images that are available through Word cover many different categories and can really help enhance your pages. If you have never inserted clip art before, Word will ask if you would like to catalog all of the available resources (clip art, sound and video files) on your computer It is a good idea to go ahead and catalog all of these free resources.
To Insert Clip Art:
• Place the insertion point where you want to insert the clip.
• Click Insert on the Menu Bar.
• Select Picture and then Clip Art from the cascading menu. The Insert Clip Art menu opens on the Task Pane
• Type a keyword in the Search Text: field.
• Click Search
and
• Specify your search by using the Other Search Options
o Search in: - specifies where Word will search for clip art. As long as the check box for Everywhere is checked, Word will search through All Collections.
o Results should be: - specified what type of file Word will search for (video, audio, photographs, clip art). As long as the check box for All Media Types is checked, Word will search through All Media Files
• Double-click the clip art or picture to add to the document.
To preview video and sound clips, click the appropriate tab and click the Play button to preview the file.
To Delete a Picture:
• Select the image (click on it).
• Press the delete key on your keyboard.
Inserting Pictures from your Computer
A picture doesn't have to be in the Clip Gallery in order for you to insert it into your document. The Clip Gallery is just an easy place to store clips you want to use again and again.
To Insert a Picture that is NOT in the Clip Gallery:
• Click Insert from the Menu Bar.
• Select Picture and From File from the cascading menu. The Insert Picture dialog box opens.
• Locate and select the file to insert the selected picture into your document.
Moving Clips
Once you have inserted a graphic into your document you can re-position the graphic until it is in the appropriate location.
By default, when a picture is imported into Word, it is aligned to the left margin. However, just as you would text, you can change the alignment so the graphic is right-aligned or centered. You can also drag the image anywhere on the page.
To Move a Clip:
• Select the clip.
• Use your mouse to drag a selected clip to any position on the page.
• The I-beam turns into a white pointer with a little box under it as you move the picture.
OR
• Use the Alignment buttons on the Formatting toolbar.
Sizing Handles
You have two options when sizing your graphics If it is important to maintain proportions, which will prevent the image from looking skewed, then you should use the corner handles to re-size the image. If you do not need to maintain the graphic's proportions, you can use the top, bottom or side handles.
2456
Changing Size While Maintaining Proportions:
• Click the image you want to re-size.
• Place the cursor over one of the corner handles. The cursor will change into a double-headed arrow.
• Drag the handles until the image is the size you need.

If any of the middle handles are dragged (top, bottom, right, or left handles), only the height and width changes, thus changing the proportion, or scale, of the picture.

You have two options when sizing your graphics If it is important to maintain proportions, which will prevent the image from looking skewed, then you should use the corner handles to re-size the image. If you do not need to maintain the graphic's proportions, you can use the top, bottom or side handles.
2456
Changing Size While Maintaining Proportions:
• Click the image you want to re-size.
• Place the cursor over one of the corner handles. The cursor will change into a double-headed arrow.
• Drag the handles until the image is the size you need.
- To keep the center of an object in the same place, hold down the CTRL key while dragging the mouse.
If any of the middle handles are dragged (top, bottom, right, or left handles), only the height and width changes, thus changing the proportion, or scale, of the picture.
- Be careful; using only the sizing handle can make your pictures blurry and distorted
Changing the Appearance of your Pictures
Sometimes you may need to not only adjust the sizing of your pictures, but you may notice the picture is too dark or too bright for your liking. You can adjust your picture using the Picture toolbar
To use the Picture Toolbar:
• Right-click the picture.
• Choose Show Picture Toolbar from the shortcut menu.

Name of Button: Use it to:

Sometimes you may need to not only adjust the sizing of your pictures, but you may notice the picture is too dark or too bright for your liking. You can adjust your picture using the Picture toolbar
To use the Picture Toolbar:
• Right-click the picture.
• Choose Show Picture Toolbar from the shortcut menu.
- Crop, Recolor Object, and Set Transparent Color buttons are used with areas of the picture. All
other buttons affect the entire picture.
Name of Button: Use it to:

Changing the Appearance of your Pictures
Sometimes you may need to not only adjust the sizing of your pictures, but you may notice the picture is too dark or too bright for your liking. You can adjust your picture using the Picture toolbar
To use the Picture Toolbar:
• Right-click the picture.
• Choose Show Picture Toolbar from the shortcut menu.
Name of Button: Use it to:
Sometimes you may need to not only adjust the sizing of your pictures, but you may notice the picture is too dark or too bright for your liking. You can adjust your picture using the Picture toolbar
To use the Picture Toolbar:
• Right-click the picture.
• Choose Show Picture Toolbar from the shortcut menu.
- Crop, Recolor Object, and Set Transparent Color buttons are used with areas of the picture. All
other buttons affect the entire picture.
Name of Button: Use it to:
Insert a Hyperlink
You can insert hyperlinks to websites or documents within your Word document.
To Insert a Hyperlink:
• Select Insert -» Hyperlink from the main menu. The Insert Hyperlink dialog box will appear
• Enter the text you wish to display as your link in the Text to display: field.
• Enter the web address in the Address: field.
• Click OK
Using Auto Text
AutoText is a feature that recognizes commonly used words and phrases as you type them. The AutoText feature can save you a great deal of time.
To Insert a Word Recommended by AutoText:
• Type text into your document. If AutoText recognizes a word or phrase, a suggestion box will hover over the word.
• Press Enter to accept the AutoText suggestion.

To Insert Predefined Text from the AutoText List:
• Select Insert -» AutoText from the main menu.
• Choose the text you wish to insert from the predefined list of words and phrases

To Insert a New Word or Phrase into the AutoText list:
• Select Insert from the main menu.
• Select AutoText -» AutoText... from the cascading menu. The AutoCorrect dialog box will appear.
• Select the AutoText tab.
• Enter the word or phrase in the Enter AutoText entries here: field.

• Click Add
• Click OK
AutoText is a feature that recognizes commonly used words and phrases as you type them. The AutoText feature can save you a great deal of time.
To Insert a Word Recommended by AutoText:
• Type text into your document. If AutoText recognizes a word or phrase, a suggestion box will hover over the word.
• Press Enter to accept the AutoText suggestion.
To Insert Predefined Text from the AutoText List:
• Select Insert -» AutoText from the main menu.
• Choose the text you wish to insert from the predefined list of words and phrases
To Insert a New Word or Phrase into the AutoText list:
• Select Insert from the main menu.
• Select AutoText -» AutoText... from the cascading menu. The AutoCorrect dialog box will appear.
• Select the AutoText tab.
• Enter the word or phrase in the Enter AutoText entries here: field.
• Click Add
• Click OK
Printing Envelopes
To Address and Print Envelopes:
• Select Tools from the main menu.
• Select Letters and Mailings -* Envelopes and Labels from the cascading menu. The Envelopes and Labels dialog box will appear.
• Enter the Delivery Address This will appear automatically if you are working with a letter at the same time.
• Enter the Return Address
• Click Options to set the envelope and printing options. The Envelope Options dialog box will appear.

• Click the Envelope Options tab.
• Make any changes to the envelope size or font.

• Click the Printing Options tab.
• Choose the correct feed method for your printer.
• Click OK
• Click Add to Document if you are working with a letter. This will display a version of the completed envelope.
OR
• Click Print to just print the envelope.
To Address and Print Envelopes:
• Select Tools from the main menu.
• Select Letters and Mailings -* Envelopes and Labels from the cascading menu. The Envelopes and Labels dialog box will appear.
• Enter the Delivery Address This will appear automatically if you are working with a letter at the same time.
• Enter the Return Address
• Click Options to set the envelope and printing options. The Envelope Options dialog box will appear.
• Click the Envelope Options tab.
• Make any changes to the envelope size or font.
• Click the Printing Options tab.
• Choose the correct feed method for your printer.
• Click OK
• Click Add to Document if you are working with a letter. This will display a version of the completed envelope.
OR
• Click Print to just print the envelope.
Printing Labels
Word allows you to print a single mailing label or a full sheet of mailing labels.
To Print Mailing Labels:
• Select Tools from the main menu.
• Select Letters and Mailings -» Envelopes and Labels from the cascading menu. The Envelopes and Labels dialog box will appear.
• Select the Labels tab.
• Enter the address in the Address: field.
• Select Full Page of same label or Single label

• Click Options. The Labels Options dialog box will appear.
• Select the product number for the labels you are using.
• Select the printing tray.
• Click OK
• Click New Document to view the labels in a new document.
OR
• Click Print to just print the labels.
Word allows you to print a single mailing label or a full sheet of mailing labels.
To Print Mailing Labels:
• Select Tools from the main menu.
• Select Letters and Mailings -» Envelopes and Labels from the cascading menu. The Envelopes and Labels dialog box will appear.
• Select the Labels tab.
• Enter the address in the Address: field.
• Select Full Page of same label or Single label
• Click Options. The Labels Options dialog box will appear.
• Select the product number for the labels you are using.
• Select the printing tray.
• Click OK
• Click New Document to view the labels in a new document.
OR
• Click Print to just print the labels.
Tracking Changes
The Track Changes feature of Word allows multiple people to work on a document, and for suggested changes to be tracked.
To "Track Changes to a Document:
• Select Tools -* Track Changes from the main menu. The Track Changes feature will be active.
• Change the document formatting or edit the text. Notice how the changes are documented on the screen.
Accepting and Rejecting Changes
When you receive a Word document that has been edited using the Track Changes feature, you will need to decide whether you want to accept or reject each of the changes.
To Accept of Reject Changes:
• Select View from the main menu.
• Select Toolbars -» Reviewing. The Reviewing Toolbar will appear

• Position your cursor next to the first proposed change.
• Click the Accept Change or Reject Change button.
• Use the Next and Previous buttons to navigate through each proposed change. Choose to accept or reject each change.
When you receive a Word document that has been edited using the Track Changes feature, you will need to decide whether you want to accept or reject each of the changes.
To Accept of Reject Changes:
• Select View from the main menu.
• Select Toolbars -» Reviewing. The Reviewing Toolbar will appear
• Position your cursor next to the first proposed change.
• Click the Accept Change or Reject Change button.
• Use the Next and Previous buttons to navigate through each proposed change. Choose to accept or reject each change.
Inserting Comments
Microsoft Word provides several tools for document collaboration. One of these features allows you to insert comments into a document and provide suggestions to the document's author without changing the original text.
To Insert a Comment:
• Position your cursor next to the word where you would like to insert a comment.
• Select Insert -»Comment from the main menu. The Reviewing toolbar will appear at the top of the page and a comment balloon will appear in the margin.
• Type your comment in the balloon.
• Click outside the balloon.
Viewing and Editing Comments
Word provides you with several document collaboration tools. One of these tools allows a person to insert comments into a document, and a different person to view and edit those comments.
To View and Edit Comments:
• Select View .... Markup from the main menu.
• View the comments in each comment balloon and decide whether to modify the document based on the comment.
• Right-click each comment balloon after reviewing the comment.
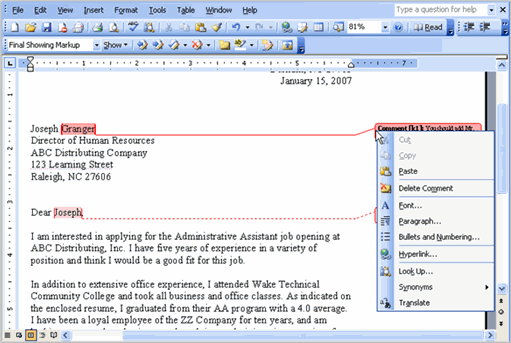
• Select Delete Comment
• Click the Next Tool on the Reviewing Toolbar to move to the next comment in the document.
Word provides you with several document collaboration tools. One of these tools allows a person to insert comments into a document, and a different person to view and edit those comments.
To View and Edit Comments:
• Select View .... Markup from the main menu.
• View the comments in each comment balloon and decide whether to modify the document based on the comment.
• Right-click each comment balloon after reviewing the comment.
• Select Delete Comment
• Click the Next Tool on the Reviewing Toolbar to move to the next comment in the document.
Compare and Merge Feature
The Compare and Merge feature of Microsoft Word allows you to compare two documents and merge them into one document.
To Compare and Merge Tow Documents:
• Open one of the files you would like to compare and merge.
• Select Tools -* Compare and Merge Documents... from the main menu. The Compare and Merge Documents dialog box will appear.
• Select the document you wish to work with.
• Click the drop-down arrow on the Merge button.
• Select Merge into current document to merge the two documents you selected into one document.

• Use the Reviewing toolbar to either accept or reject each proposed change.
The Compare and Merge feature of Microsoft Word allows you to compare two documents and merge them into one document.
To Compare and Merge Tow Documents:
• Open one of the files you would like to compare and merge.
• Select Tools -* Compare and Merge Documents... from the main menu. The Compare and Merge Documents dialog box will appear.
• Select the document you wish to work with.
• Click the drop-down arrow on the Merge button.
• Select Merge into current document to merge the two documents you selected into one document.
• Use the Reviewing toolbar to either accept or reject each proposed change.
Creating New Documents Using the Templates Feature
Microsoft Word provides several ways to create a new document. You can start with a new, blank document or you can use a predefined template. A template is a sample document, or pattern, that you can personalize.
To Use a Template:
• Select File .... New from the main menu. The New Document task pane will appear
• Look in the Templates section of the New Document task pane. You can access templates from three locations:
o Templates on Office Online
o On my computer o On my websites
• Select On my computer to view templates that are preloaded on your computer
• Click one of the eight category tabs:
o General
o Legal Pleadings o Letters & Faxes o Mail Merge o Memos
o Other Documents o Publications o Reports
• Select one of the templates to view it in the Preview section.

• Click OK. The template will appear in your Word window.
• Insert your text into the template.
• Save and close the document.
Microsoft Word provides several ways to create a new document. You can start with a new, blank document or you can use a predefined template. A template is a sample document, or pattern, that you can personalize.
To Use a Template:
• Select File .... New from the main menu. The New Document task pane will appear
• Look in the Templates section of the New Document task pane. You can access templates from three locations:
o Templates on Office Online
o On my computer o On my websites
• Select On my computer to view templates that are preloaded on your computer
• Click one of the eight category tabs:
o General
o Legal Pleadings o Letters & Faxes o Mail Merge o Memos
o Other Documents o Publications o Reports
• Select one of the templates to view it in the Preview section.
• Click OK. The template will appear in your Word window.
• Insert your text into the template.
• Save and close the document.
Using Mail Merge
To Use Mail Merge:
• Select Tools on the main menu.
• Select Letters and Mailings -» Mail Merge
The Mail Merge task pane appears and will guide you through the six main steps to complete a mail merge. You will have many decisions to make during the process. The following is an example of how to create a form letter and merge the letter with a data list.
Steps 1-3
• Choose the type of document you wish to create. In this example, select Letters.
• Click Next:Starting document to move to Step 2.
• Select Use the current document.
• Click Next: Select recipients to move to Step 3.
• Select the Type a new list button.
• Click Create to create a data source. The New Address List dialog box appears.
To Edit the New Address List:
o Click Customize in the dialog box. The Customize Address List dialog box appears.
o Select a field and click Delete.
o Click Yes to confirm that you wish to delete the field.
o Continue to delete any unnecessary fields.
o Click Rename. The Rename Field dialog box appears.
o Enter the new name you would like to give the field in the To: field.
o Continue to rename any fields necessary.
o Click OK to close the Customize Address List dialog box.
• Enter the necessary data in the New Address List dialog box.
• Click New Entry to enter another record.
• Click Close when you have entered all your data records.
• Enter the file name you wish to save the data list as.
• Choose the location you wish to save the file.
• Click Save. The Mail Merge Recipients dialog box appears and displays all the data records in the list.
• Confirm the data list is correct and click OK.
• Click Next:Write your letter to move to Step 4.
Steps 4-6
• Write a letter in the current Word document. Stop writing when you reach a place in the letter where you wish to enter a field from your data record.
To Insert Data from the Data List:
o Click the Insert Merge Fields button. The Insert Merge fields dialog box appears.
o Select the field you would like to insert in the document.
o Click Insert. Notice that a placeholder appears where information from the data record will eventually appear.
o Repeat these steps each time you need to enter information from your data record.
• Click Next: Preview your letters in the task pane once you have completed your letter
• Preview the letters to make sure the information from the data record appears correctly in the letter.
• Click Next: Complete the merge
• Click Print to print the letters.
• Click All.
• Click OK in the Merge to Printer dialog box.
• Click OK to send the letters to the printer
> The Mail Merge wizard allows you to complete the mail merge process in a variety of ways. The best way to learn how to use the different functions in Mail Merge is to try to develop several of the different documents -letters, labels, envelopes -- using the different types of data sources.
Egytech: Ms Word 2003 >>>>> Download Now
ReplyDelete>>>>> Download Full
Egytech: Ms Word 2003 >>>>> Download LINK
>>>>> Download Now
Egytech: Ms Word 2003 >>>>> Download Full
>>>>> Download LINK ra